General description
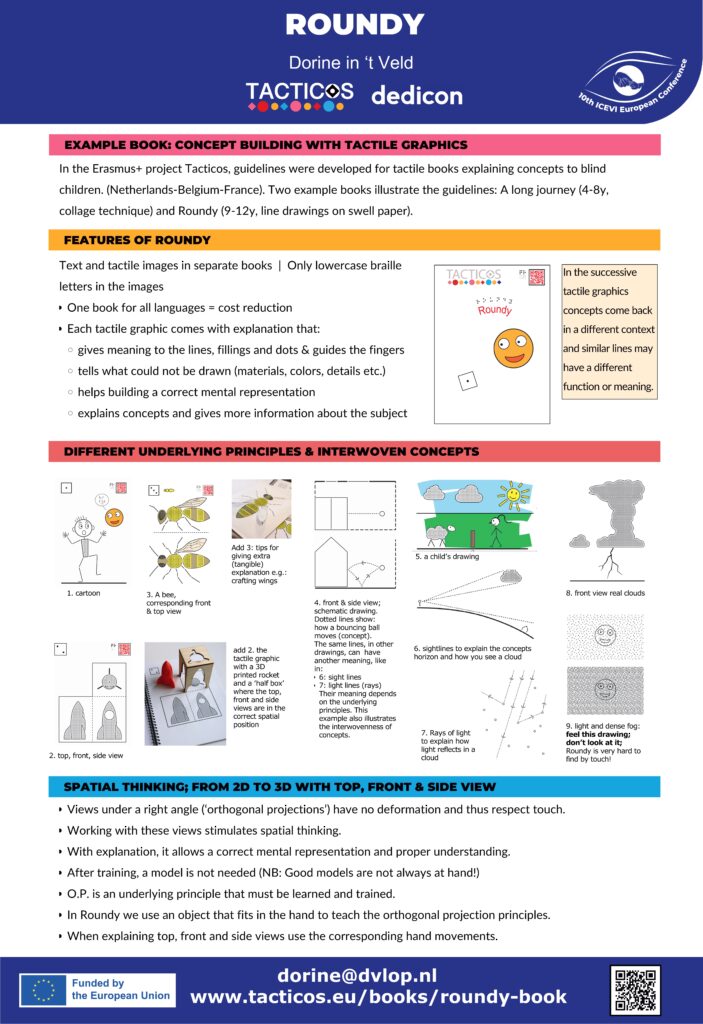
The poster has a dark blue bar on top with the title, presenter, affiliation and logo’s. It is divided into 4 sections by bars in the colours of the Tacticos project. Each of these bars contains the heading of the section. At the bottom is another dark blue bar with contact-details, URL and a QR code to this accessible version.
Note: the alt texts in the images contained information that is interesting to everyone. That is why in this transcription the alt texts are put in the main text after ‘Alt text description’. (The alt texts now contain just the title).
Title bar
- ROUNDY, Dorine in ‘t Veld, Dedicon
- Logo’s: Dedicon, Tacticos and 10th ICEVI European Conference
Section 1
Example book: concept building with tactile graphics
(Text box:) In the Erasmus+ project Tacticos guidelines were developed for tactile books explaining concepts to blind children. (Netherlands-Belgium-France). Two example books illustrate the guidelines: A long journey (4-8, collage technique) and Roundy (9-12, line drawings on swell paper).
Section 2
Features of Roundy
Text box:
- Text and tactile images in separate books | Only lowercase braille letters in the images
- One book for all languages = cost reduction
- Each tactile graphic comes with explanation that:
- gives meaning to the lines, fillings and dots & guides the fingers
- tells what could not be drawn (materials, colors, details etc.)
- helps building a correct mental representation
- explains concepts and gives more information about the subject
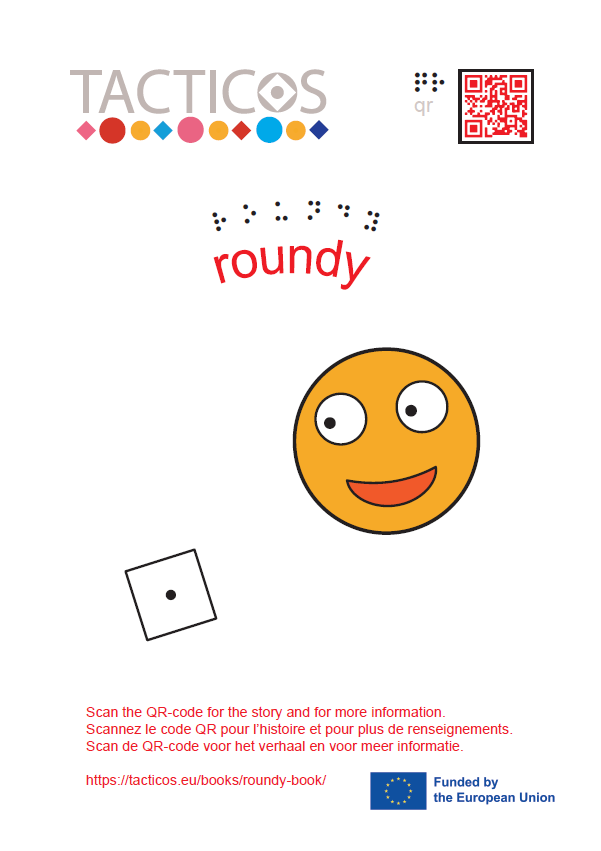
Image: Cover of Roundy.
Alt text description:
Top left: the Tacticos logo in grey letters that do not swell.
Top right: a qr code in red ink that doesn’t swell in a black and thus tangible square.
QR is printed in braille dots (black) that swell, without permanent capital sign. Under the braille QR is printed in grey ink letters. Capital sign is different in different languages. That is why it was omitted. QR in capitals however is the convention, so the grey letters are capitals.
Underneath: Roundy in red ink letters in a slight bow. This is a word joke: a bit round. The braille above is also in a slight bow (again only lower case braille characters) in black ink.
Under that an emoticon-like face with large pupils looking to the left. That is: the emoticon looks to the right (concept!).
Bottom left a square slightly tilted to the left with 1 dot in the middle. These two concepts return in drawing 1, Bob meets Roundy.
Section 3
Different underlying principles & interwoven concepts
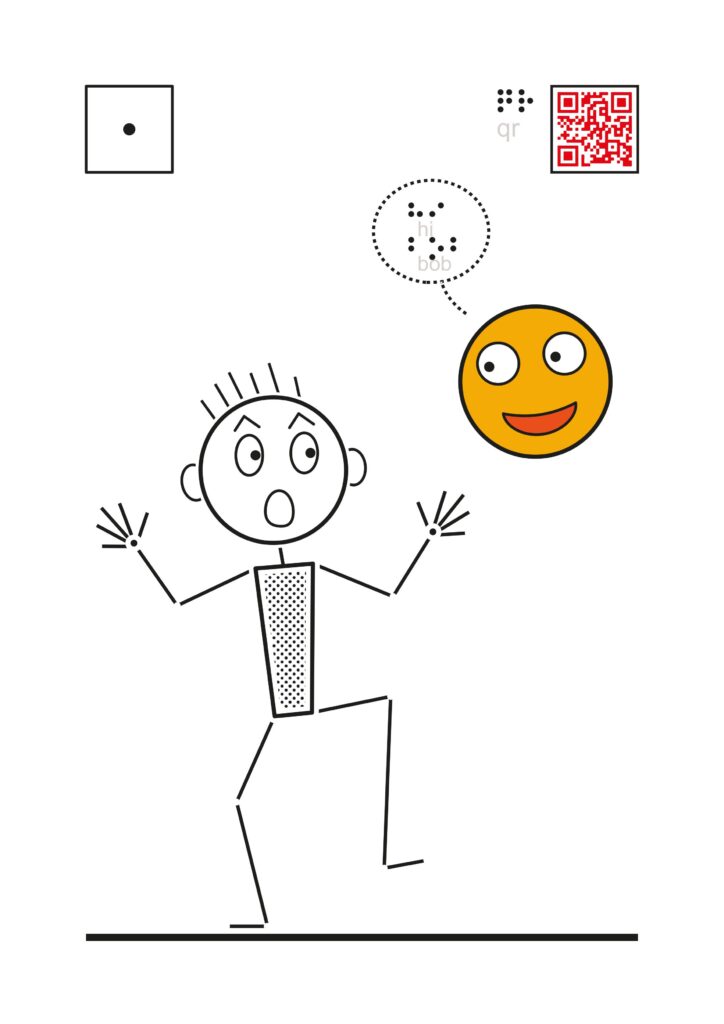
Image with subscript: “1. Cartoon”.
Alt text description:
- Tactile graphic 1. Bob meets Roundy. A cartoon.
Bob, blind, jumps with fright when he is in the garden. He thinks he is alone but suddenly hears ‘hi bob’.
We see: on top: on the left a square with a dot in the middle, indicating the number of the tactile graphic. On the right is a QR code, like on the cover.
The tactile graphic shows a wire puppet with 6 standing hairs (blind children think this is ‘weird’). An emoticon like face that we met on the cover: Roundy is a little higher than Bob’s head. Above him is a speech cloud with hi bob in it, in braille and small grey letters. A thick horizontal line indicates the ground.
Important: think this image upright.
Type of drawing: a cartoon; not showing realistically what things look like, but rather what happens, how the characters feel and react.
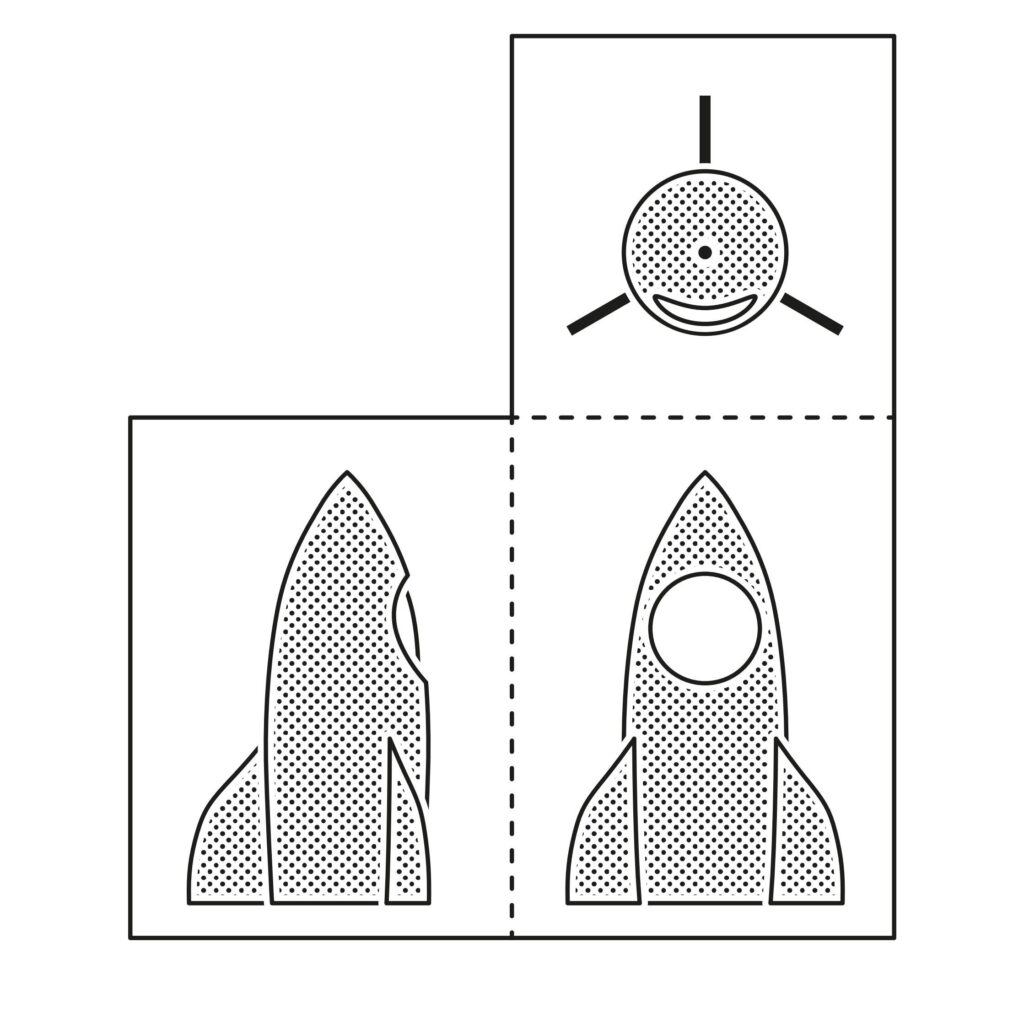
Image with subscript “2. top, front, side view”
Alt text description:
- Tactile graphic with orthogonal projection of Roundy’s rocket.
The page is divided in 4 quadrants.
The upper left quadrant is empty, the upper right one contains the top view. Under the top view is the front view and the left of that the side view (from the left).
All views are orthogonal, i.e. under a right angle, without any deformation by perspective.
You must think the top view horizontal, the front and side view vertical, i.e.: the front view towards you and the side view folded backwards in an angle of 90 degrees.
So, with the object in front of you, the front view is what your hands meet when they move away from your body, the side view is what your left hand meets, the top view is what your hands meet when approaching from above.
Image with subscript “add 2. the tactile graphic with a 3D printed rocket and a ‘half box’ where the top, front and side views are in the correct spatial position”
Alt text description:
Addition to image 2: photo of the tactile graphic with standing on top of it a 3D printed rocket that is standing on the empty quadrant, next to a wooden half box that is standing on the top view.
To make this half box, the empty quadrant must be cut away. Also the views of the rocket must be cut out. Then the graphic is placed vertically. The top view is folded backwards to a horizontal position. The rocket can pass top down. And next it can be pushed through the front of the half box. The side view is folded backwards in a vertical position. Now the rocket can the left to the right (vice versa).
This underlying principle to imagine the views in their correct position and combine them comes back in many tactile graphics, starting with number 3, the bee.
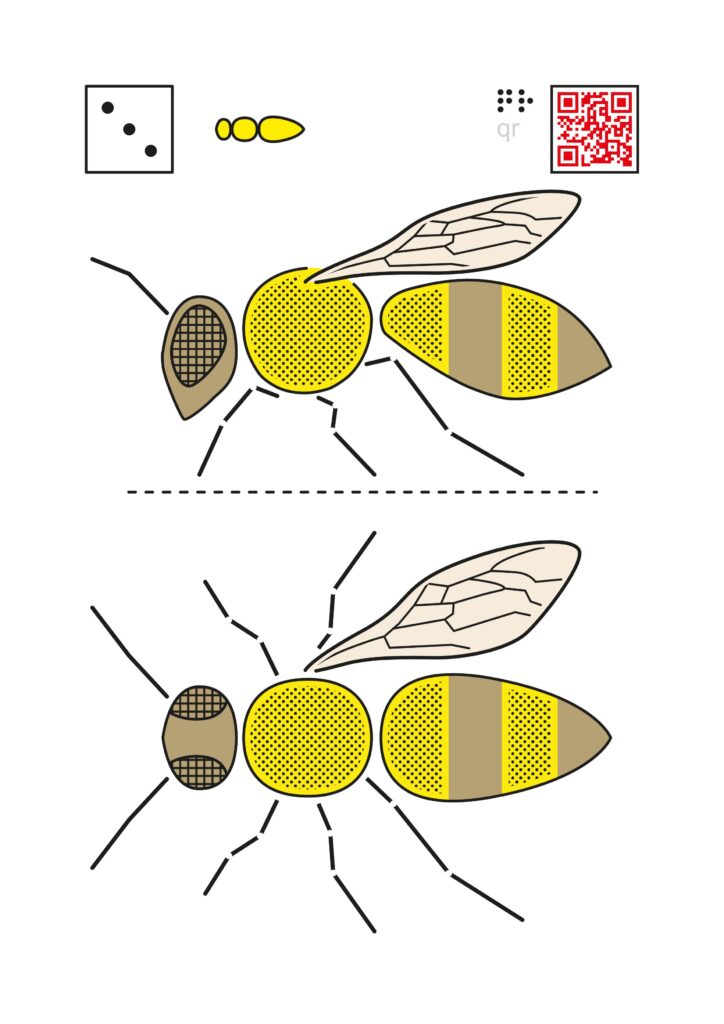
Image with subscript “3. A bee, corresponding front & top view”
Alt text description:
- Tactile grapic of a bee. Upper half of the page: front view; i.e.: the bee is standing with the head to the left and its tail to the right so we look at its side. Working with views reveals the position of the object in space as if it were in front of you.
Corresponding below the front view is the top view.
In the front view you see 1 wing, 1 antenna and 3 legs. In the top view on one side the wing is left away because it covers a leg, so you don’t see where it is attached to the body of the bee. The wingless side reveals this.
In the explanation that comes with the tactile graphic this is explained. If the child doesn’t understand and asks for help, the adult might craft two wings and put them on the right place, symmetrically (another concept).
A bee is typically difficult to explore by touch in the real world. The explanation also tells what could not be drawn, such as there are very small hairs on the legs to make pollen stick, the material of the body and (many) other things to know about the concept bee.
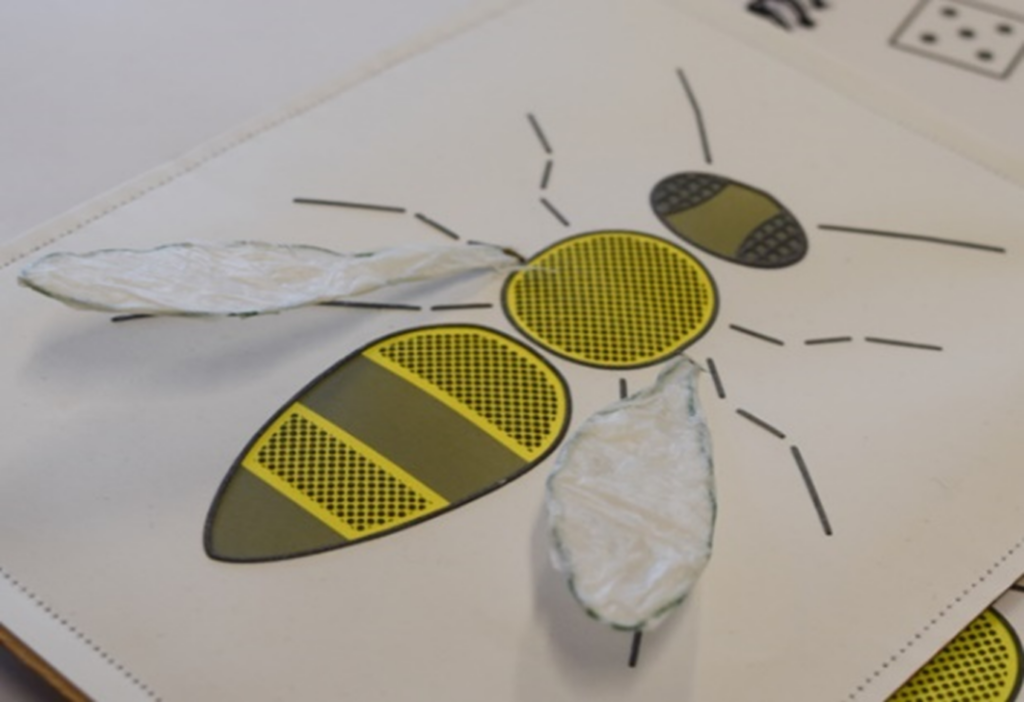
Image with subscript: “Add 3: tips for giving extra (tangible) explanation e.g.: crafting wings”
Alt text description:
Addition to image 3: a photo of a top view of the bee where the wings, made of iron wire and thin paper, stand out obliquely from the body.
If you have a swell oven you can make a top view of the bee without the wings, but with all 6 legs. If not you can do this with other materials.
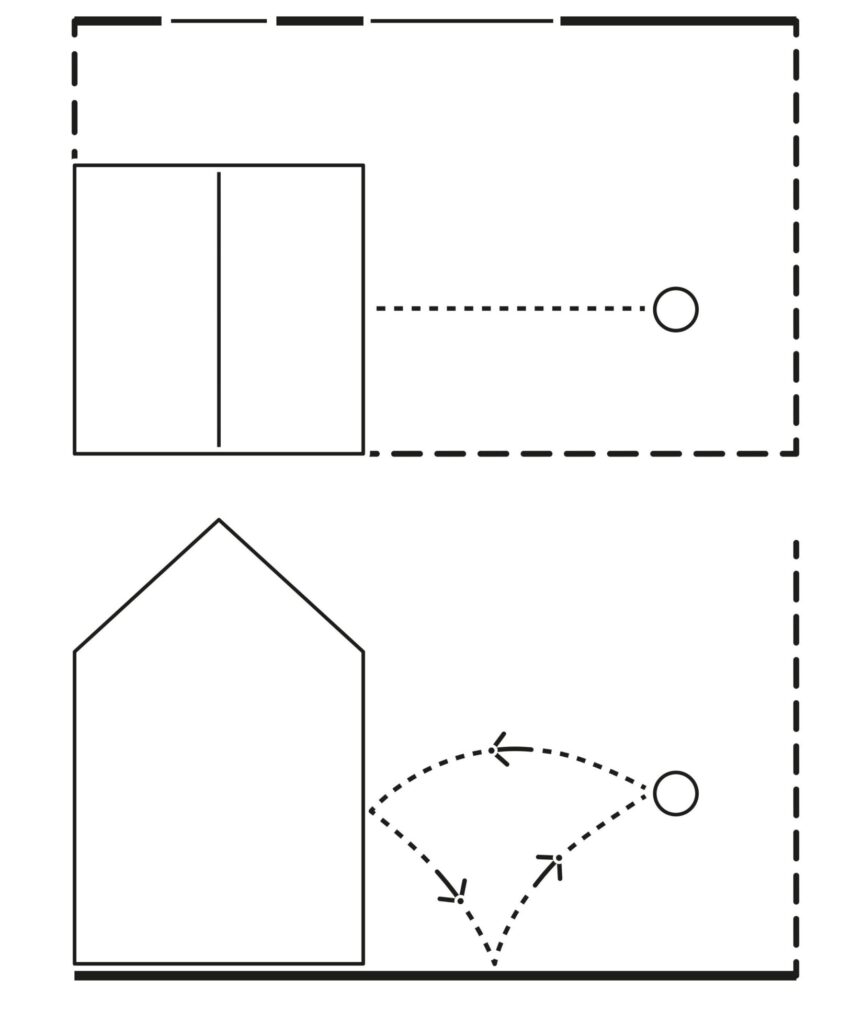
Image with subscript: “4. front & side view; schematic drawing. Dotted lines show: how a bouncing ball moves (concept).
The same lines, in other drawings, can have another meaning, like in:
- 6: sight lines
- 7: light lines (rays)
Their meaning depends on the underlying principles. This example also illustrates the interwovenness of concepts.
Alt text description:
- Tactile graphic of a corresponding top and front view of the small garden with a barn and Bob bouncing a ball (i.e. Roundy) to its wall. The side of the barn is facing us showing the tilted roof. In the top view this looks like two rectangles.
The position of Bob(s hands) is shown by a circle.
The path of the bouncing ball is shown by dotted lines; in the front view arrows are added.
Blind children typically cannot form an idea of how a ball bounces (in this case with a bow).

Image with subscript: “5. a child’s drawing”
Alt text description:
- A child’s drawing of a sheep in a meadow and a wire puppet of a girl with a pony tail. A fence (vertical line) is between them.
Above the horizon we see sheep clouds and a sun with a smiling face and rays. Typically how children draw the sun.
In order to understand such a drawing, the part underneath the horizon must be thought horizontal and the part above the horizon must be thought of as vertical, but not only corresponding with one position on the ground. This is a difficult concept! In another drawing the concepts horizon and what you see of a cloud – and what exactly is a cloud – are further explained.
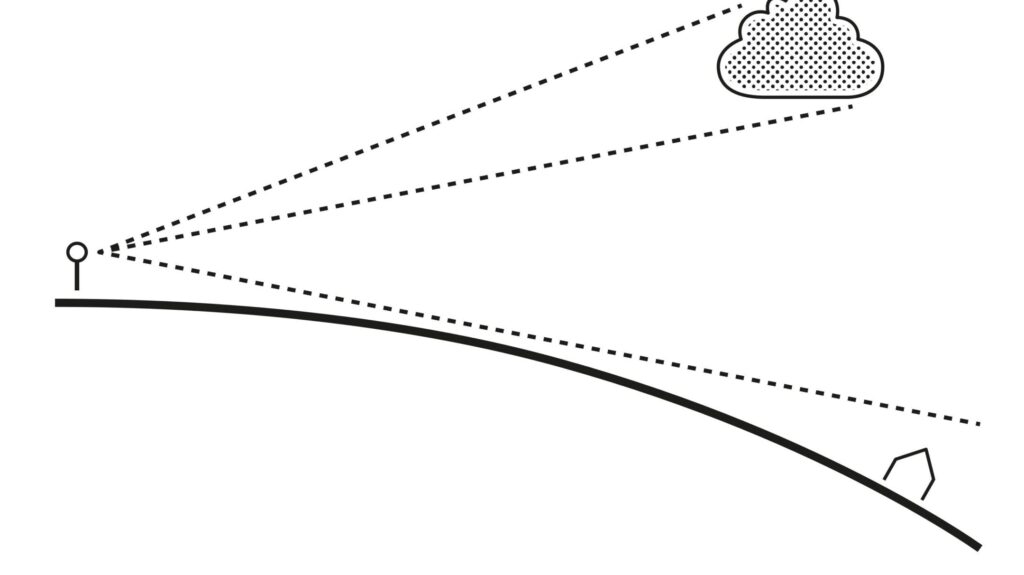
Image with subtitle: “6. sightlines to explain the concepts horizon and how you see a cloud”
Alt text description:
- A schematic drawing with an imaginary front view of a person standing on the round earth, seeing a cloud in the sky and not seeing a house that is behind the horizon, i.e. the place where the sightline meets with the curve of the ground or sea. The proportions of the person, the house and the cloud and the curve of the ground are not correct; this drawing serves to clearly show ‘how it works’ and is not in realistic dimensions.
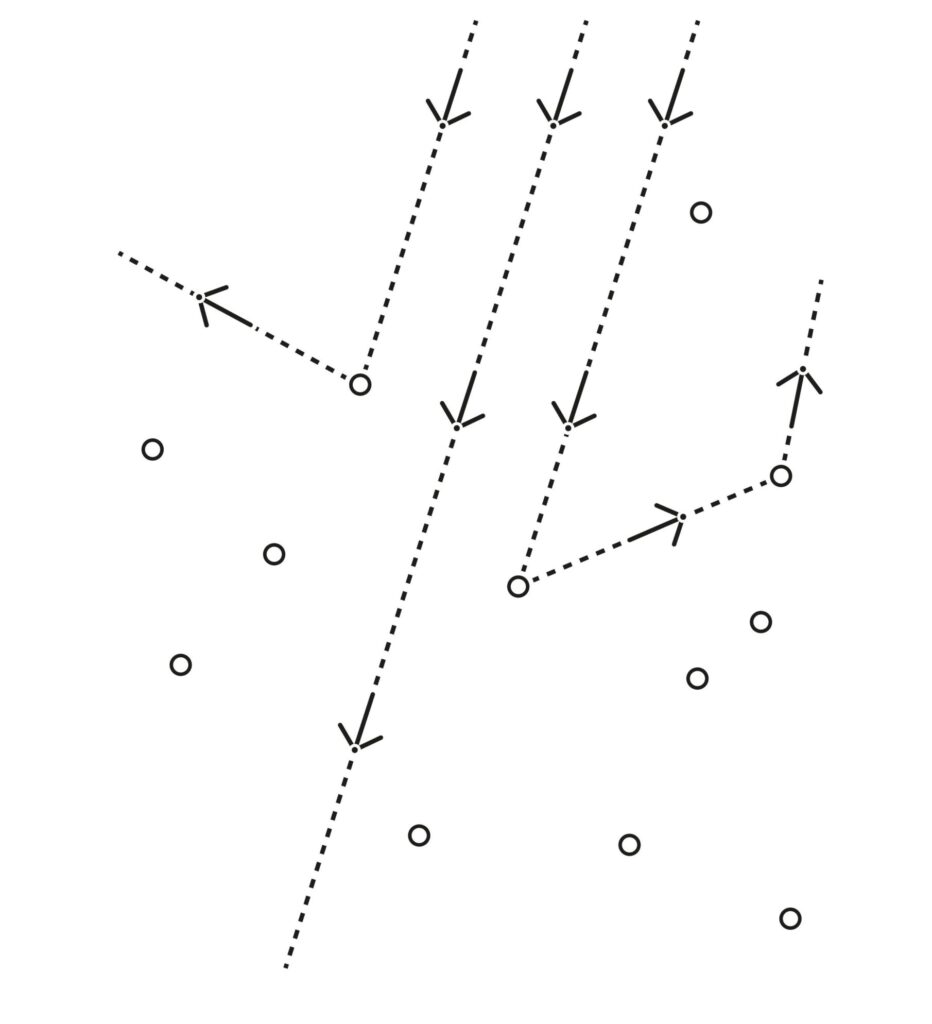
Image with subscript: “7. Light lines to explain light reflection in a cloud”
Alt text description:
7. A schematic drawing with three light lines (rays) coming from above. When they fall on small circles, water droplets, they are randomly reflected up and sideways. One ray doesn’t meet a drop and continues its way down. This explains why clouds are bright on top and less bright or even dark grey at the bottom.
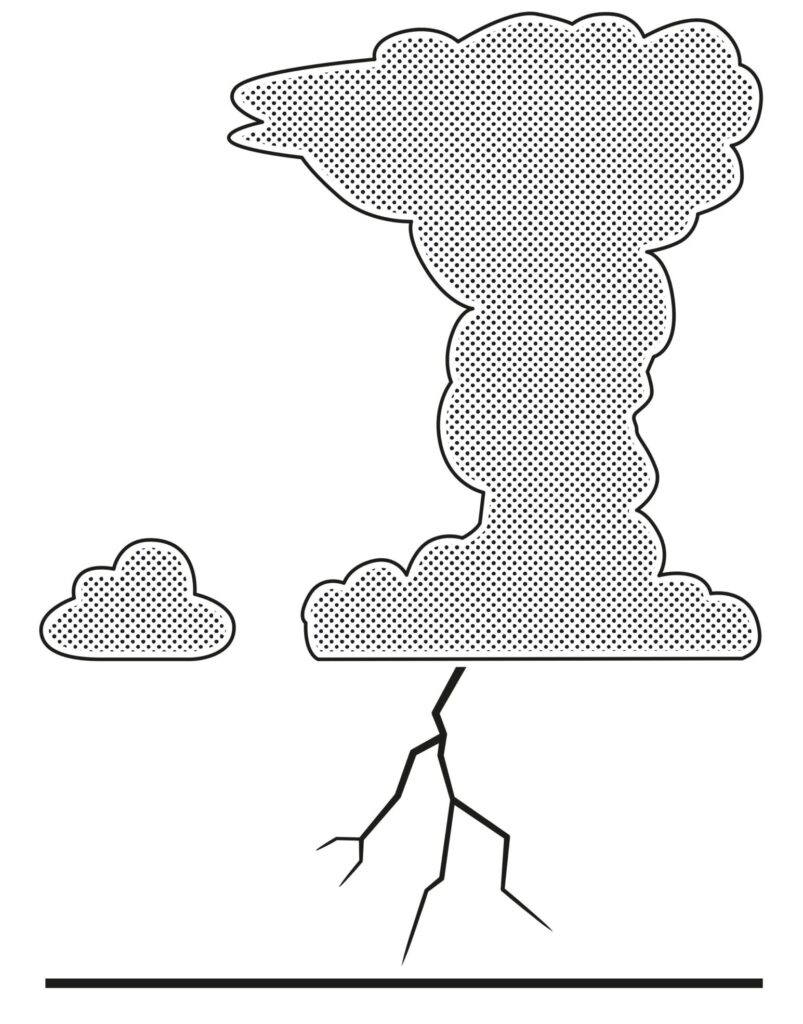
Image with subscript: “8. Front view real clouds”
Alt text description:
8. This tactile graphic shows a sheep cloud next to a thundercloud with lightning underneath. A thick line at the bottom is the ground (earth). The sheep cloud is on the left. It has a flat bottom and has curves on top. The thundercloud also has a flat bottom, but is much larger. While climbing up it gets narrow and on top it has a much wider anvil shaped part. Its edge has curves all around except at the bottom.
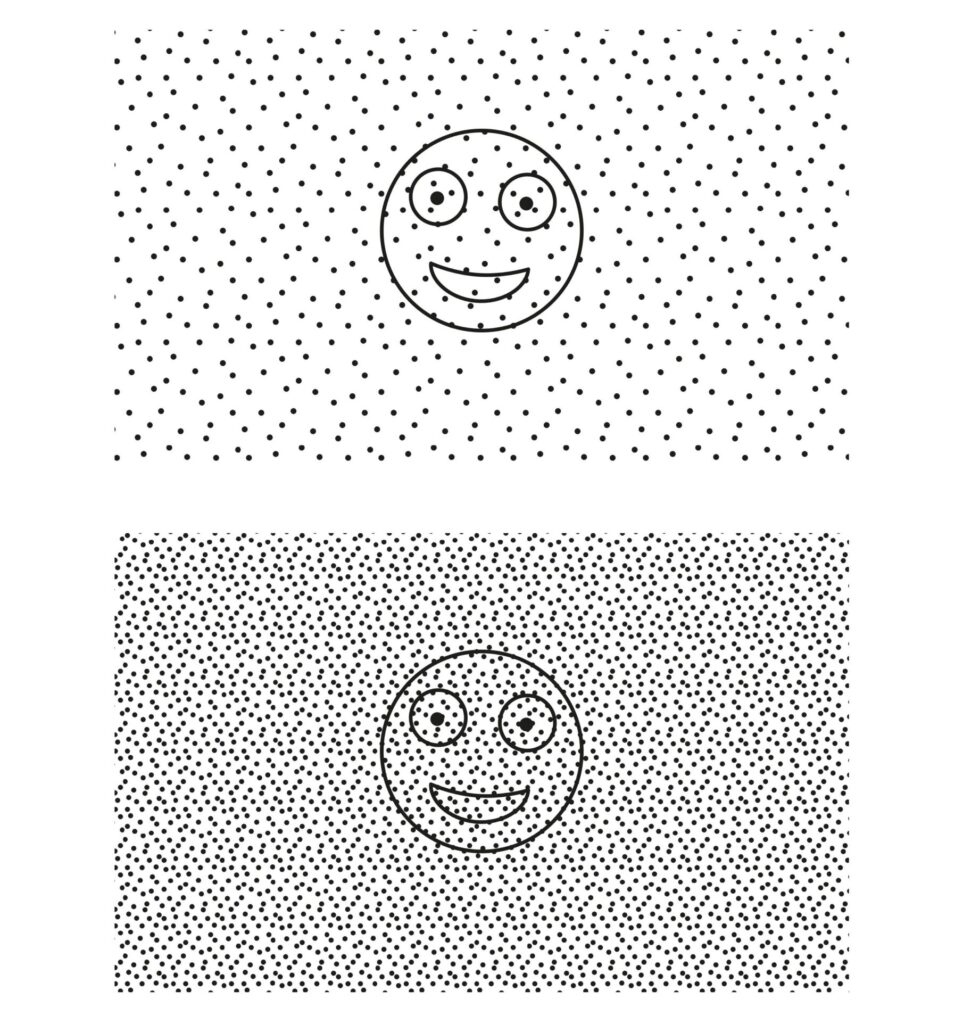
Image with subscript: “9. light and dense fog: feel this drawing; don’t look at it; Roundy is very hard to find by touch!”
Alt text description:
- The tactile graphic shows twice the face of Roundy. On top in a field of small dots, fairly wide apart, below in a field of dots with much less distance between them. For sighted people in both cases Roundy is fairly well visible; when exploring the tactile image with the fingers in the upper drawing it is hard to find Roundy, whereas it is almost impossible in the lower drawing.
This tactile graphic clearly shows to sighted people that you must always proofread with the fingers to make sure your graphic is well readable. It shows to blind people the effect to sight of light and dense fog.
Section 4
Spatial thinking; from 2D to 3D with Top, Front & Side view
Text box:
- Views under a right angle (‘orthogonal projections’) have no deformation and thus respect touch.
- Working with these views stimulates spatial thinking.
- With explanation, it allows a correct mental representation and proper understanding.
- After training, a model is not needed (NB: Good models are not always at hand!)
- O.P. is an underlying principle that must be learned and trained.
- In Roundy we use an object that fits in the hand to teach the orthogonal projection principles.
- When explaining top, front and side views use the corresponding hand movements.
Bar with contact details
Logo with ‘Funded by the European Union.
dorine@dvlop.nl | https://tacticos.eu/books/roundy-book/